Cyndaquil - Free amigurumi pattern
|
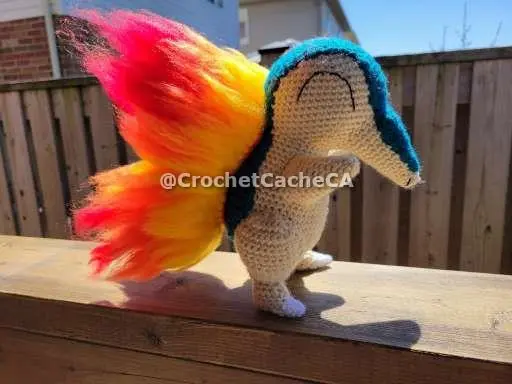
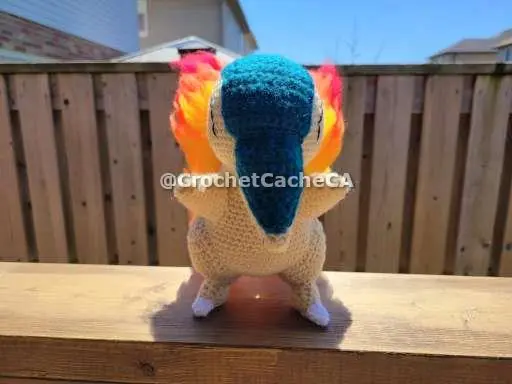
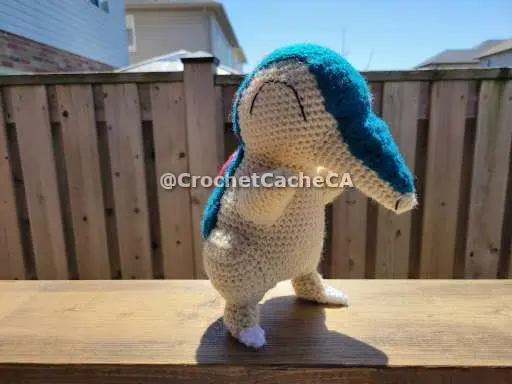
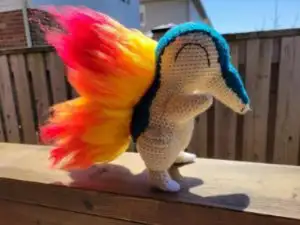
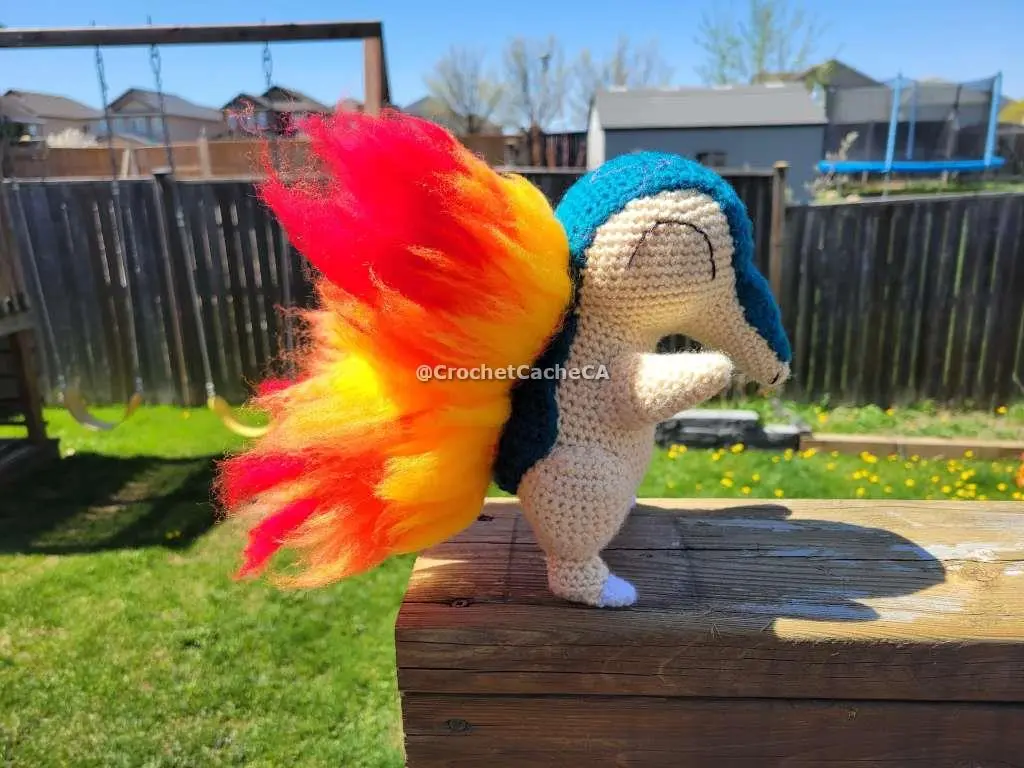
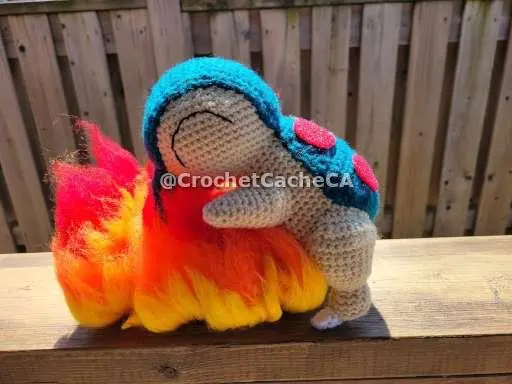
Hey there! If you are like me, then you grew up playing the Pokémon games and watched the television series. I thought I would share a pattern that I created that brings one of my favorite Pokémon characters to life: Cyndaquil, who is one of the three starter Pokémon that trainers can choose from in Pokémon Gold and Silver (two of my personal favorites in the series). This character pattern is fun to make and it is a great way to practice your crochet techniques. I have added some options when adding the fire. It is time to crochet 'em all! This pattern I think turned out extremely well, if you do use this pattern please @CrochetCacheCA on social media. I would love to see the results! |
Materials and Information
Yarns:
**All yarns are in Weight 4 - Medium / Worsted
- Almond - Bernat Premium
- Teal - Impeccable - Loops & Threads
- Sunny Day - Impeccable - Loops & Threads
- Flame - Red Heart - Super Saver
- Cherry Red - Red Heart Super Saver
- White - Red Heart Soft
US Crochet Terms
Abbreviations:
- Rnd(s): Round(s)
- Row(s): Row(s)
- sc: Single Crochet
- dc: Double Crochet
- hdc:Half Double Crochet
- tr: Treble or triple Crochet
- dtr: Double Treble or Quadruple Crochet
- inv dec: Invisible decrease
- dec: Decrease
- dc dec: Double Crochet Decrease
- inc: Increase
- dc inc: Two double crochets in the same stitch
- cc: Colour Change, followed by the colour
- sl st: Slip Stitch
Additional Materials:
- - Black - Aunt Lydia's Crochet Thread - Fashion 3 (1 Super Fine)
- - 4.5mm crochet hook
- - Bent Yarn needles
- - Scissors
- - Red velcro (optional)
- - Red felt(optional)
Tips:
- - Keep track of beginning of rows by using a marker
- - 4.5mm crochet hook
- - Crochet this toy with tight stitches, helps not show the stuffing through
- - To keep details such as increases, make sure to add extra stuffing in these areas as you stuff them.
Suggested Materials
While some of the exact colors I originally used may no longer be available, I've compiled a list of similar materials that work great for this pattern. You can find them below, and they're all to Amazon, to make your shopping easier.
Use Policies:
You may not redistribute, sell or claim this pattern in it entirety, or in part of, as your own design/pattern
You are welcome to sell finish products made from this pattern, as long as you provide credit for the pattern as 'Pattern by Crochet Cache' if posted on a social platform other than Facebook, Instagram, Twitter. Else provide credit as 'Pattern by @CrochetCacheCA' on Instagram, Twitter or Facebook.
I am not responsible for any legal repercussions that may incur, this character is not licensed by me.
Cyndaquil is property of the Pokemon franchise, I have no ownership of this character in any way. It is property of Nintendo.
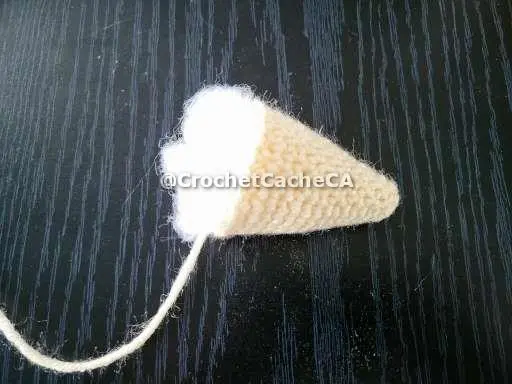
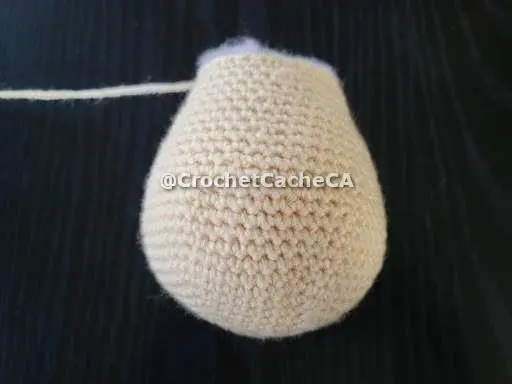
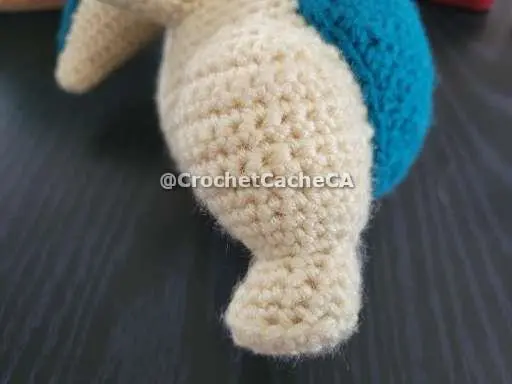
Nose
| Rnd 1 | Almond - 6sc in Magic Circle (6) |
| Rnd 2 | 6sc (6) |
| Rnd 3 | (1sc, inc) x 3 (9) |
| Rnd 4 | 9sc (9) |
| Rnd 5 | (2sc, inc) x 3 (12) |
| Rnd 6 | 12sc (12) |
| Rnd 7 | (3sc, inc) x 3 (15) |
| Rnd 8 | 15sc (15) |
| Rnd 9 | (4sc, inc) x 3 (18) |
| Rnds 10-11 | 18sc (18) |
| Rnd 12 | (5sc, inc) x 3 (21) |
| Rnd 13 | 21sc (21) |
| Rnd 14 | (6sc, inc) x 3 (24) |
| Rnds 15-16 | 24sc (24) - sl st, leaving long tail for attaching to the head and stuff |
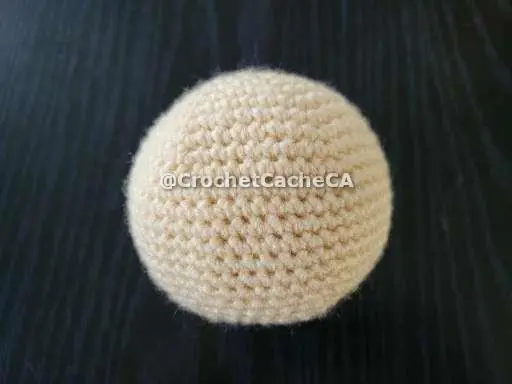
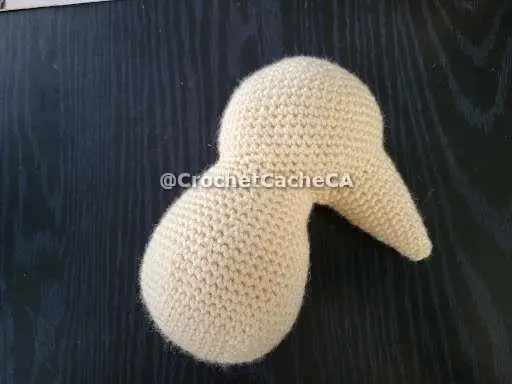
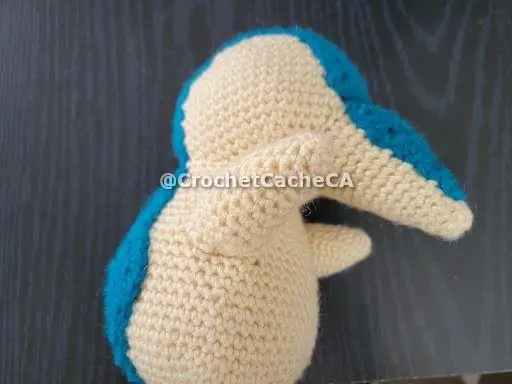
Head
| Rnd 1 | Blue - 6sc in Magic Circle (6) |
| Rnd 2 | 6inc (12) |
| Rnd 3 | (1sc, inc) x 6 (18) |
| Rnd 4 | (2sc, inc) x 6 (24) |
| Rnd 5 | (3sc, inc) x 6 (30) |
| Rnd 6 | (4sc, inc) x 6 (36) |
| Rnd 7 | (5sc, inc) x 6 (42) |
| Rnd 8 | (6sc, inc) x 6 (48) |
| Rnd 9 | (7sc, inc) x 6 (54) |
| Rnds 10-17 | 54sc (54) |
| Rnd 18 | (7sc, inv dec) x 6 (48) |
| Rnd 19 | (6sc, inv dec) x 6 (42) |
| Rnd 20 | (5sc, inv dec) x 6 (36) |
| Rnd 21 | (4sc, inv dec) x 6 (30) |
| Rnd 22 | (3sc, inv dec) x 6 (24) - Start Stuffing |
| Rnd 23 | (2sc, inv dec) x 6 (18) |
| Rnd 24 | (1sc, inv dec) x 6 (12) |
| Rnd 24 | 6inv dec (6) - sl st - Stitch the remaining 6 loops together then tighten all stitches fasten off and cut and hide remaining tail. |
Body
| Rnd 1 | Almond - 6sc in Magic Circle (6) |
| Rnd 2 | 6inc (12) |
| Rnd 3 | (1sc, inc) x 6 (18) |
| Rnd 4 | (2sc, inc) x 6 (24) |
| Rnd 5 | (3sc, inc) x 6 (30) |
| Rnd 6 | (4sc, inc) x 6 (36) |
| Rnd 7 | (5sc, inc) x 6 (42) |
| Rnd 8 | (6sc, inc) x 6 (48) |
| Rnd 9 | (7sc, inc) x 6 (54) |
| Rnds 10-11 | 54sc (54) |
| Rnd 12 | (8sc, inc) x 6 (60) |
| Rnds 13-14 | 60sc (60) |
| Rnd 15 | (8sc, dec) x 6 (54) |
| Rnds 16-17 | 54sc (54) |
| Rnd 18 | (7sc, dec) x 6 (48) |
| Rnds 19-20 | 48dc (48) |
| Rnd 21 | (6sc, dec) x 6 (42) |
| Rnds 22-23 | 42sc (42) |
| Rnd 24 | (5sc, dec) x 6 (36) |
| Rnds 25-26 | 36sc (36) |
| Rnd 27 | (4sc, dec) x 6 (30) |
| Rnds 28-29 | 30sc (30) - sl st, leave a long tail to attach to the body and stuff. |
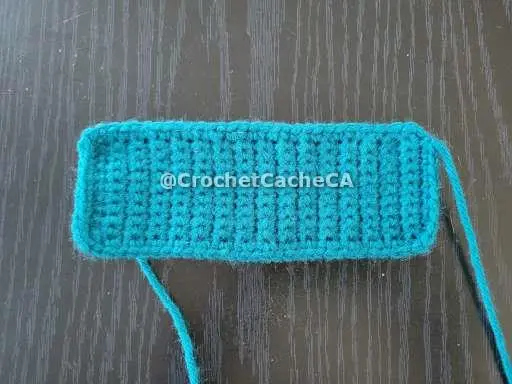
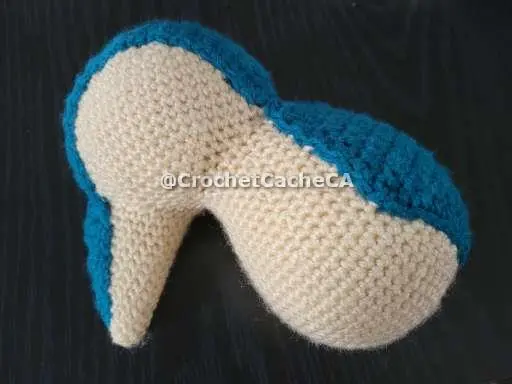
Head Teal Patch
| Note: | Attach the head to the body before making this. So you can measure the stripe from where the head is connected to the body to the top of the nose. If it is short add so more rounds of the 10Sc. |
| Row 1 | Teal - Chain 11, turn skip chain close to hook, 10sc, Chain turn. (10) |
| Rows 2-31 | 10sc, Chain turn (10) -Don't chain turn the last row. sc around all four sides, sl st, leave a really long tail to attach it to the head. |
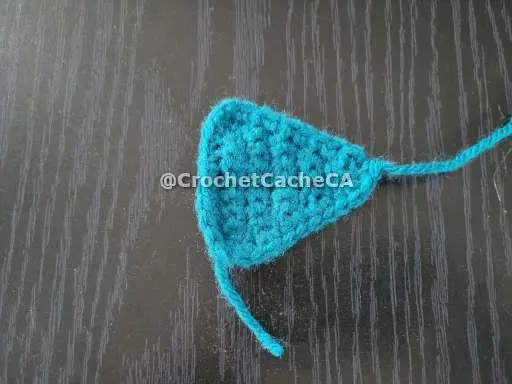
Nose Teal Patch
| Row 1 | Teal - Chain 11, turn skip chain close to hook, 10sc, Chain turn. (10) |
| Row 2 | 10sc, Chain turn (10) |
| Row 3 | dec, 6sc, dec, Chain Turn (8) |
| Row 4 | 8sc, Chain turn (8) |
| Row 5 | dec, 4sc, dec, Chain turn (6) |
| Row 6 | 6sc, Chain turn (6) |
| Row 7 | dec, 2sc, dec, Chain turn (4) |
| Row 8 | 4sc, Chain turn (4) |
| Row 9 | 2dec, Chain turn (2) |
| Row 10 | 2sc, Chain turn - sc all around piece, sl st leaving a long tail to attach to the head/nose. |
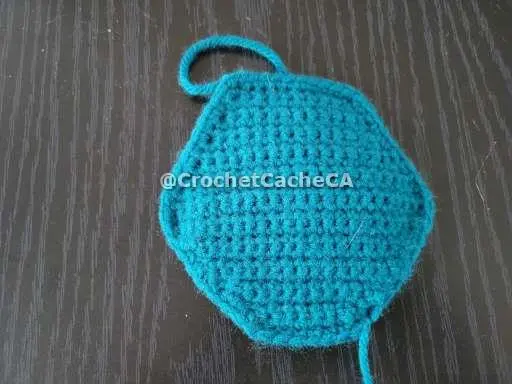
Back Teal Patch
| Row 1 | Teal - Chain 11, turn skip chain close to hook, 10sc, Chain turn. (10) |
| Row 2 | inc, 9sc, Chain Turn (11) |
| Row 3 | inc, 10sc, Chain Turn (12) |
| Row 4 | inc, 11sc, Chain Turn (13) |
| Row 5 | inc, 12sc, Chain Turn (14) |
| Row 6 | inc, 13sc, Chain Turn (15) |
| Row 7 | inc, 14sc, Chain Turn (16) |
| Row 8 | inc, 14sc, inc, Chain Turn (18) |
| Row 9 | inc, 16sc, inc, Chain Turn (20) |
| Row 10 | inc, 18sc, inc, Chain Turn (22) |
| Rows 11-13 | 22sc, Chain Turn (22) |
| Row 14 | dec, 18sc, dec, Chain Turn (20) |
| Row 15 | dec, 16sc, dec, Chain Turn (18) |
| Row 16 | 18sc, Chain Turn (18) |
| Row 17 | dec, 14sc, dec, Chain Turn (16) |
| Row 18 | 16sc, Chain Turn (16) |
| Row 19 | dec, 12sc, dec, Chain Turn (14) |
| Row 20 | 14sc, Chain Turn (14) |
| Row 21 | dec, 10sc, dec, Chain Turn (12) |
| Row 22 | 12sc, Chain Turn (12) |
| Row 23 | dec, 8sc, dec, Chain Turn (10) |
| Row 24 | 10sc (10) - sc all around piece, sl st leaving a long tail to attach to the body. |
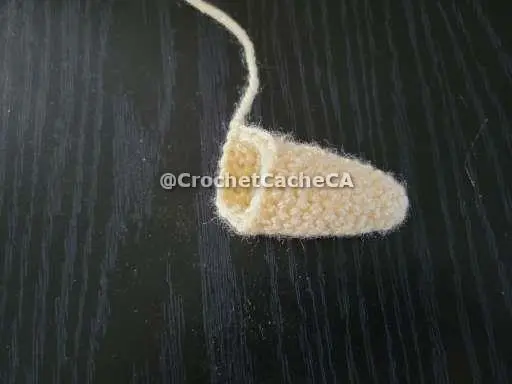
Arms
**Make Two**
| Rnd 1 | Almond - 6sc in Magic Circle (6) |
| Rnd 2 | 6sc (6) |
| Rnd 3 | (inc, sc) x 3 (9) |
| Rnd 4 | 9sc (9) |
| Rnd 5 | (inc, 2sc) x 3 (12) |
| Rnds 6-7 | 12sc (12) |
| Rnd 8 | (inc, 3sc) x 3 (15) |
| Rnds 9-10 | 15sc (15) |
| Rnd 11 | Turn work, 9sc |
| Rnd 12 | Turn work, 8sc |
| Rnd 13 | sc all around work, sl st, leaving long tail to attach to body and stuff |
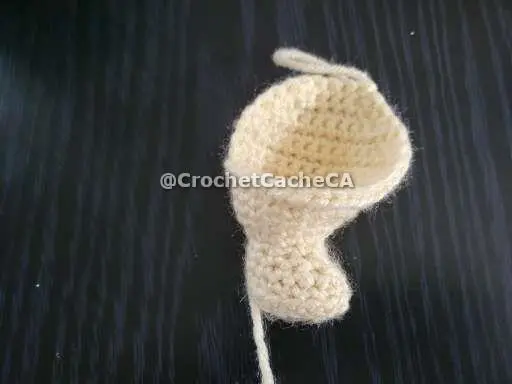
Legs
**Make Two**
| Almond - Chain 7, skip closest stitch near the hook, 5sc, 3sc in next stitch, 4sc, inc in next stitch (14). |
|
| Rnd 1 | 14sc (14) |
| Rnd 2 | 14sc in back loops only (14) |
| Rnd 3 | 3sc, 3dec, 5Ss (11) |
| Rnd 4 | 3sc, 2dec, 4sc (9) |
| Rnd 5 | 9sc (9) |
| Rnd 6 | 9inc (18) |
| Rnd 7 | 6sc, 2inc, 10sc (20) |
| Rnd 8 | 20sc (20) |
| Rnd 9 | 6sc, 4inc, 10sc (24) |
| Rnds 10-14 |
***Left Leg*** 13sc, chain turn |
| Rnds 10-14 |
***Right Leg*** (Chain turn - for rnd 10 only), 13sc, chain turn |
| Rnd 15 | dec, 9sc, dec, Chain Turn |
| Rnd 16 | dec, 7sc, dec, Chain Turn |
| Rnd 17 | dec, 5sc, dec, Chain Turn |
| Rnd 18 | dec, 3sc, dec, Chain Turn |
| Rnd 20 | - sc around the opening of the leg. - sl st, leave long tail to attach to body, stuff the foot and stuff the thigh as attaching to the body. |
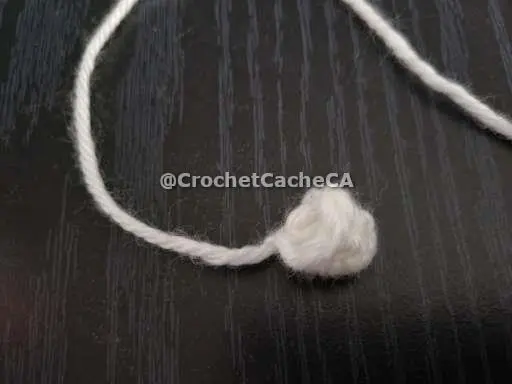
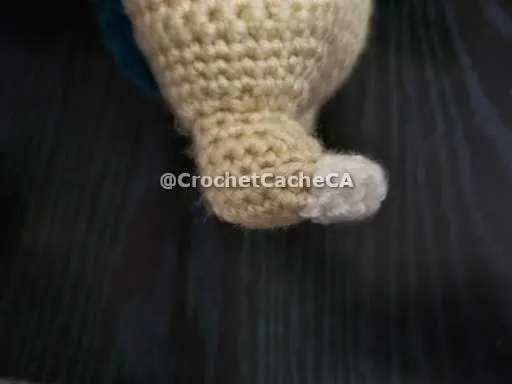
Toes
**Make Two**
| Rnd 1 | White - 3sc in Magic Circle (3) |
| Rnd 2 | 3sc (3) |
| Rnd 3 | 3inc (6) |
| Rnd 4 | 6sc (6) - sl st, leave long tail to attach to feet and a small amount of stuffing. |
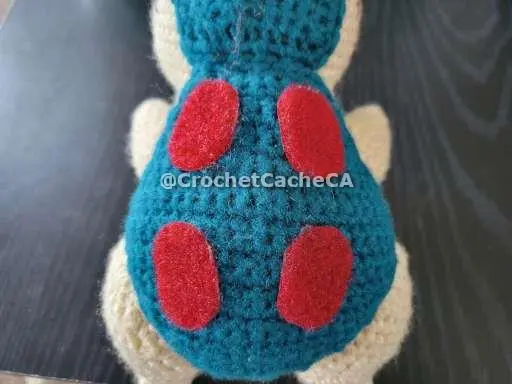
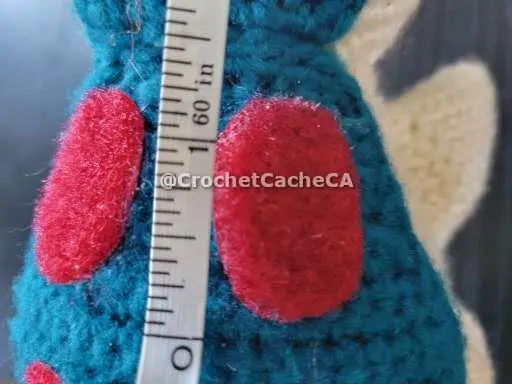
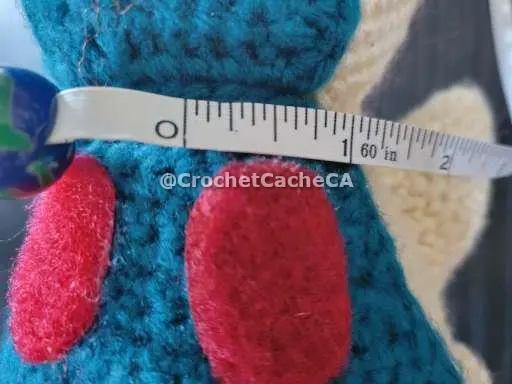
Spots on Back
For spots on the back you have two options:
Cut the felt or velcro (soft velcro side, not the hooks side) into the shapes below. You can sew them if you would like. I hot glued mine to the back. The velcro is for if your making the fire removable. If you are making cyndaquil with out fire then use the felt. If you are making the fire not removable you do not need the velcro or the felt. |
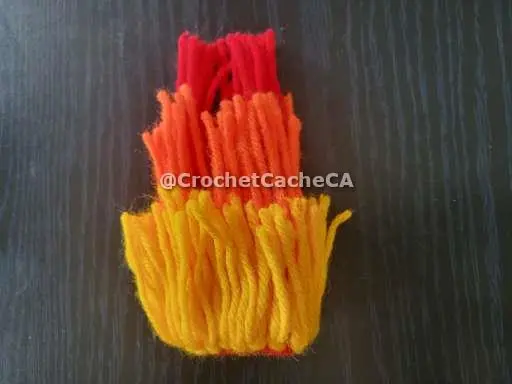
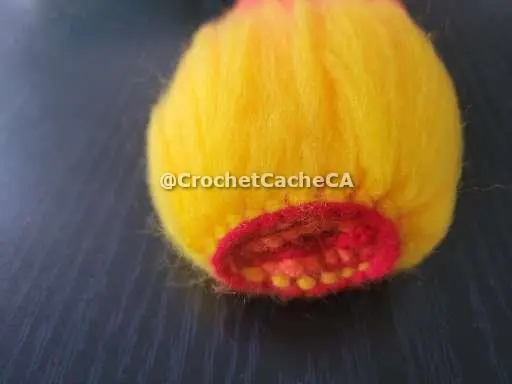
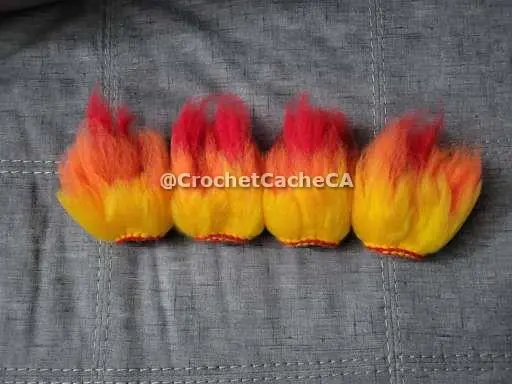
Fire
**Make Four**
| Whether you make the fire removable or not use the following instructions to make the fire for his back. | |
| Red - Chain 6, skip look closest to the hook, 4Sc, 3Sc in same loop, 4Sc, 3Sc in same loop (14) | |
| Rnd 1 | (4Sc, 3Inc) x 2 (20) - Sl St leave long tail if direct attaching to back. Else if removable fire, secure and cut short. |
| Strings Needed | |
| Red - | Cut 10 inch strings x 20 |
| Orange - | Cut 8 inch strings x 30 |
| Yellow - | Cut 6 inch strings x 40 |
| Attaching Strings | |
| Red - | Group four strings together and fold in half. Feed the loop through the center of the crochet oval and back through. Feed the ends of the strings through the loops and pull taut, trying to keep the ends the same length. Do this 5 times in the center row of the oval. |
| Orange - | Group two strings together and fold in half. Feed the loop through next to the red in the crochet oval and back through. Feed the ends of the strings through the loops and pull taut, trying to keep the ends the same length. Do this 15 times in the center row of the oval. |
| Yellow - | Group two strings together and fold in half. Feed the loop through next to the orange in the crochet oval and back through. Feed the ends of the strings through the loops and pull taut, trying to keep the ends the same length. Do this 20 times in the center row of the oval. |
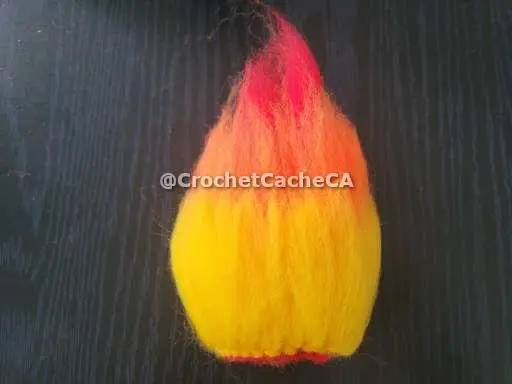
Using a wire pet brush, brush out the tied strings to get a more realistic looking fire. You will have chunks of the string come off that is ok. |
|
Assembly
- NOTE: do this before you make the teal head stripe, so you can use the distance from the back of the head to the top of the nose to measure. Attach the head to the body.
- - Attach the nose pointing down.
- - Attach the teal stripes.
- - Attach the legs next the body teal stripe for the back of, with a slight tilt to the legs and body.
- - Attach the toes to the legs
- - Attach arms at the side of Cyndaquil.
- This part is different depending on your choice for the fire or no fire:
- If you choose no fire. Sew or hot glue the red spots on his back on the teal.
- If you choose the fire but perminant, then with the long red tail left attach the fire to his back
- If you choose removable fire. Hot glue and/or sew the soft side of the velcro to his back. hot glue the hook side to the fire.
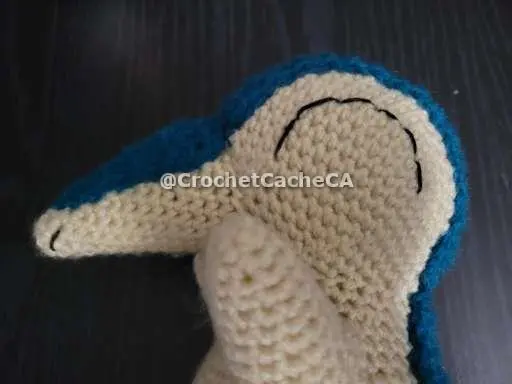
- - Stitch on the eyes half circles
- - Stitch on nostrils.
YOUR DONE!
Conclusion