Squirtle - Free amigurumi pattern
|
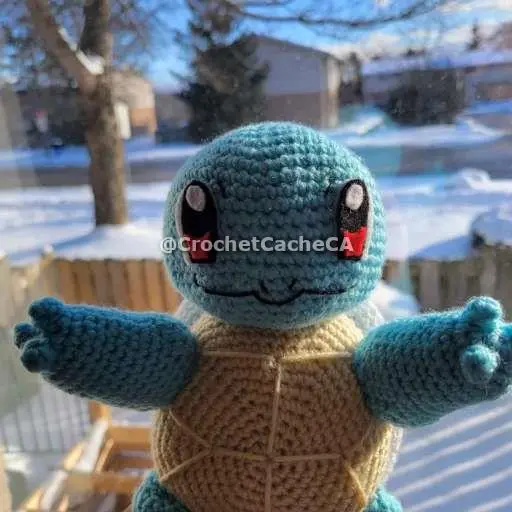
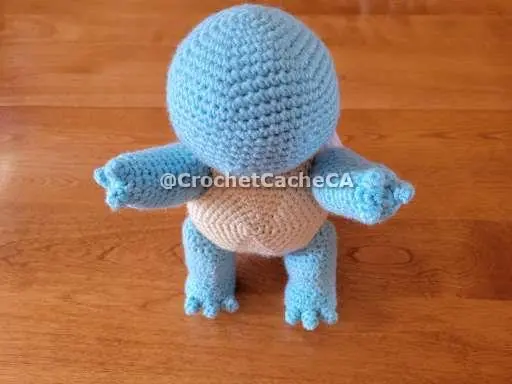
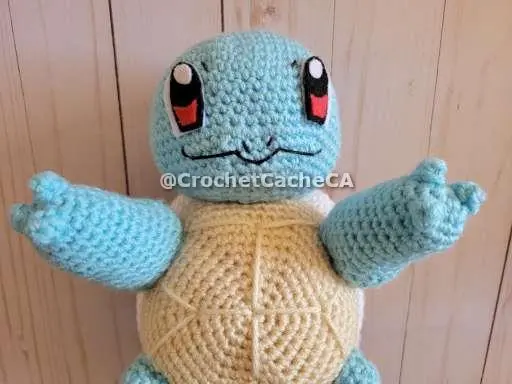
Squirtle is one of the original Pokémon in the series, from Red and Blue. He is a turtle with a hard shell, who shoots water out of his mouth with surprising force. If you or the Pokémon fanatic in your life have ever wanted to own a Squirtle from Pokémon, this is the place for you! This post will take you through the process in crocheting to make an amigurumi Squirtle. I honestly always chose Charmander because he was fire type, but as I got older I learned I appreciate this amphibian. I still remember watching the show when I was little, seeing the Squirtle Squad and thinking how cool they were. If you do use this pattern, please @CrochetCacheCA on social media. I would love to see the results! |
Materials and Information
Yarns:
**All yarns are in Weight 4 - Medium / Worsted
- Blue - Craftsmart Aqua
- Almond - Bernat
- White - Red Heart Soft
- Brown - Red Heart Soft Toast
US Crochet Terms
Abbreviations:
- Rnd(s): Round(s)
- Row(s): Row(s)
- sc: Single Crochet
- dc: Double Crochet
- hdc:Half Double Crochet
- tr: Treble or triple Crochet
- dtr: Double Treble or Quadruple Crochet
- inv dec: Invisible decrease
- dec: Decrease
- dc dec: Double Crochet Decrease
- inc: Increase
- dc inc: Two double crochets in the same stitch
- cc: Colour Change, followed by the colour
- sl st: Slip Stitch
Additional Materials:
- - Black - Aunt Lydia's Crochet Thread - Fashion 3 (1 Super Fine)
- - 4.5mm crochet hook
- - Bent Yarn needles
- - Scissors
- - Black, Red and White felt
Tips:
- - Keep track of beginning of rows by using a marker
- - 4.5mm crochet hook
- - Crochet this toy with tight stitches, helps not show the stuffing through
- - To keep details such as increases, make sure to add extra stuffing in these areas as you stuff them.
Use Policies:
You may not redistribute, sell or claim this pattern in it entirety, or in part of, as your own design/pattern
You are welcome to sell finish products made from this pattern, as long as you provide credit for the pattern as 'Pattern by Crochet Cache' if posted on a social platform other than Facebook, Instagram, Twitter. Else provide credit as 'Pattern by @CrochetCacheCA' on Instagram, Twitter or Facebook.
I am not responsible for any legal repercussions that may incur, this character is not licensed by me.
Squirtle is property of the Pokemon franchise, I have no ownership of this character in any way. It is property of Nintendo.
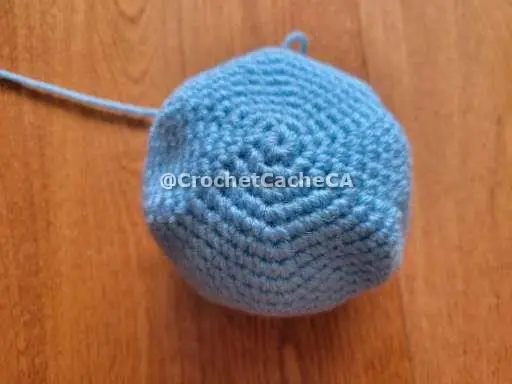
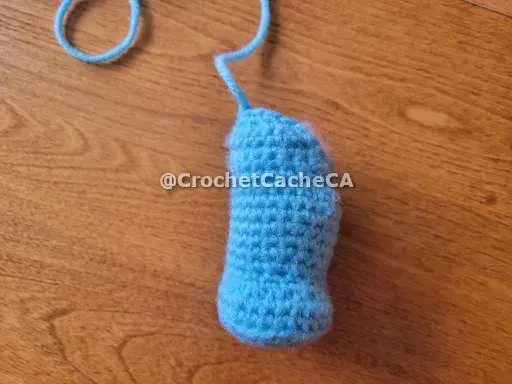
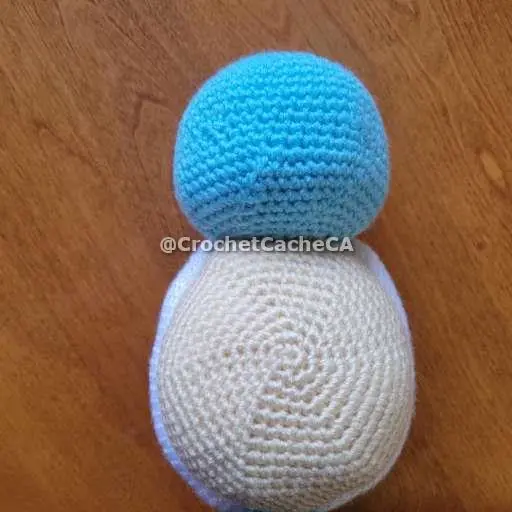
Head
| Rnd 1 | Blue - 6sc in Magic Circle (6) |
| Rnd 2 | 6inc (12) |
| Rnd 3 | (1sc, inc) x 6 (18) |
| Rnd 4 | (2sc, inc) x 6 (24) |
| Rnd 5 | (3sc, inc) x 6 (30) |
| Rnd 6 | (4sc, inc) x 6 (36) |
| Rnd 7 | (5sc, inc) x 6 (42) |
| Rnd 8 | (6sc, inc) x 6 (48) |
| Rnd 9 | (7sc, inc) x 6 (54) |
| Rnds 10-13 | 54sc (54) |
| Rnd 14 | 15sc, inc, sc, inv dec, sc, tr, inv dec, 8sc, inv dec, tr, sc, inv dec, sc, inc, 15sc (52) *Tr marks the eye locations |
| Rnds 15-16 | 52sc (52) |
| Rnd 17 | 14sc, (inc, 3sc) x 3, (3sc, inc) x 3, 14sc (58) |
| Rnd 18 | 28sc, 2inc, 28sc (60) |
| Rnd 19 | (8sc, inv dec) x 6 (54) |
| Rnd 20 | (7sc, inv dec) x 6 (48) |
| Rnd 21 | (6sc, inv dec) x 6 (42) |
| Rnd 22 | (5sc, inv dec) x 6 (36) |
| Rnd 23 | (4sc, inv dec) x 6 (30) |
| Rnd 24 | (3sc, inv dec) x 6 (24) - Start Stuffing |
| Rnd 25 | (2sc, inv dec) x 6 (18) |
| Rnd 26 | (1sc, inv dec) x 6 (12) |
| Rnd 27 | 6inv dec (6) - sl st, leave tail - Stitch the remaining 6 loops together then tighten all stitches fasten off and cut and hide remaining tail. |
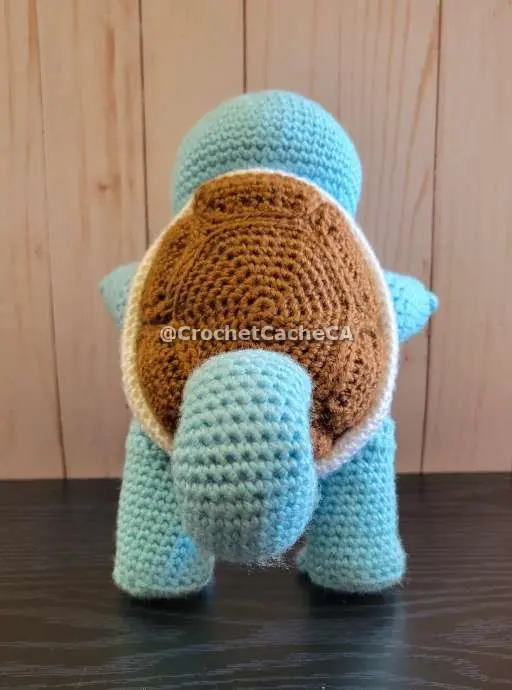
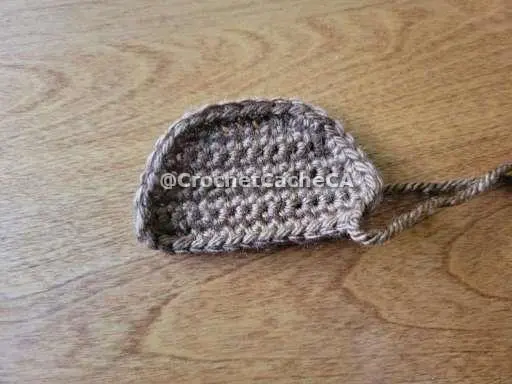
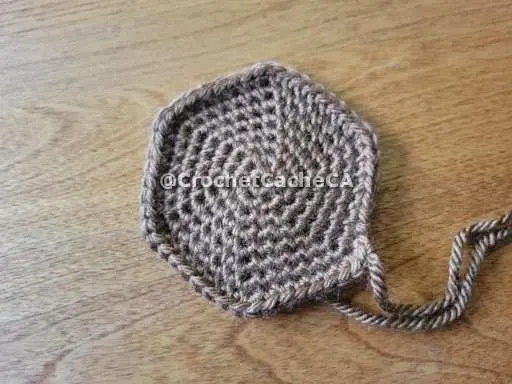
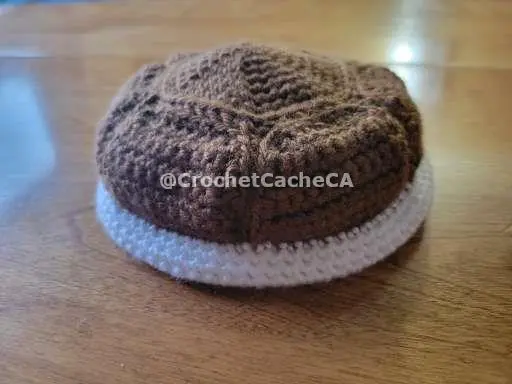
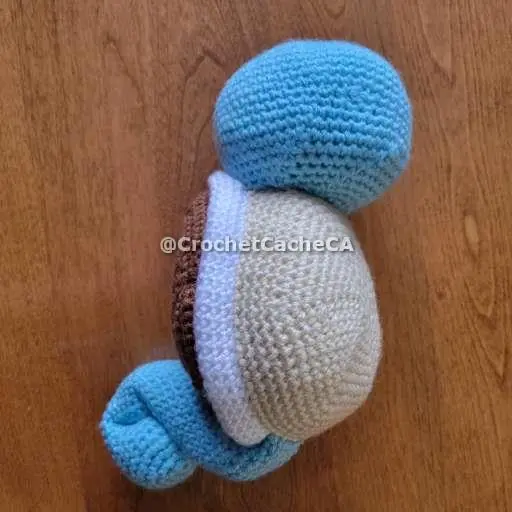
Shell - Sides
**Make Six**
| Row 1 | Brown - Chain 9, turn skip chain close to hook, 8 sc, Chain turn. (8) |
| Row 2 | inc, 6sc, inc, Chain turn (10) |
| Row 3 | 10sc, Chain turn (10) |
| Row 4 | inc, 8sc, inc, Chain turn (12) |
| Row 5 | 12sc, Chain turn (12) |
| Row 6 | inc, 10sc, inc, Chain turn (14) |
| Row 7 | 14sc (14) - sc all away around piece, sl st, leave long tail |
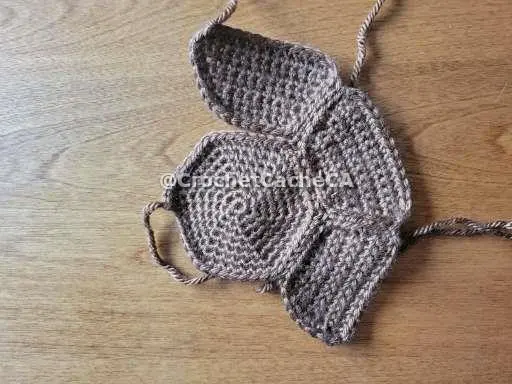
Shell - Middle
| Rnd 1 | Brown - 6sc in Magic Circle (6) |
| Rnd 2 | 6inc (12) |
| Rnd 3 | (1sc, inc) x 6 (18) |
| Rnd 4 | (2sc, inc) x 6 (24) |
| Rnd 5 | (3sc, inc) x 6 (30) |
| Rnd 6 | (4sc, inc) x 6 (36) |
| Rnd 7 | (5sc, inc) x 6 (42) |
| Rnd 8 | (6sc, inc) x 6 (48) - sl st leave long tail. - Stitch the short side of each side piece together and attach to the middle shell. Repeat until you get all sides attached to the middle piece. |
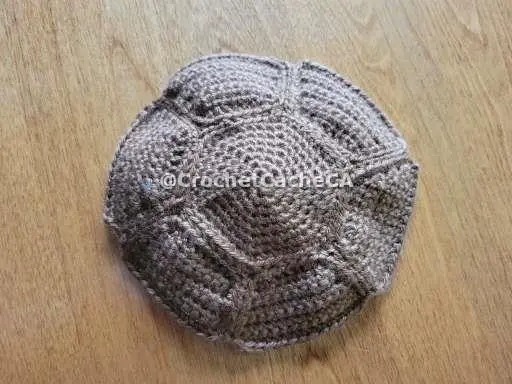
Shell - Rim
| - Attach white yarn on edge of shell, sc completely around the shell edge. |
| - 76sc x 6 (or what ever stitch count you got on your first white round) |
| - Fold/roll the whole edge of the white back toward the shell where you do the first round of white. Stitch it closed, to create a tube of white on the edge of the shell. |
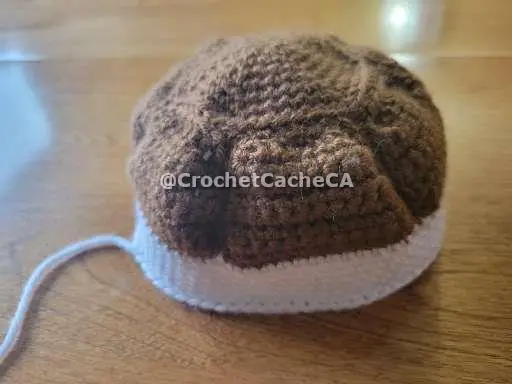
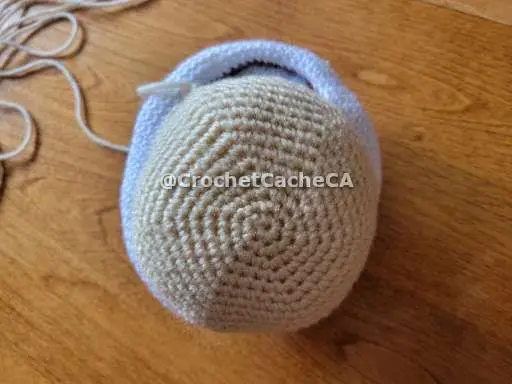
Body
| Rnd 1 | Almond - 6sc in Magic Circle (6) |
| Rnd 2 | 6inc (12) |
| Rnd 3 | (1sc, inc) x 6 (18) |
| Rnd 4 | (2sc, inc) x 6 (24) |
| Rnd 5 | (3sc, inc) x 6 (30) |
| Rnd 6 | (4sc, inc) x 6 (36) |
| Rnd 7 | (5sc, inc) x 6 (42) |
| Rnd 8 | (6sc, inc) x 6 (48) |
| Rnd 9 | (6sc, inc) x 6 (54) |
| Rnd 10 | (7sc, inc) x 6 (60) |
| Rnd 11 | (8sc, inc) x 6 (66) |
| Rnds 12-15 | 66sc (66) - sl st, leave long tail to attach to shell and the head. - Stitch to where the white and brown connect on the shell, leave a space of one of the six side open to attach the head to later. |
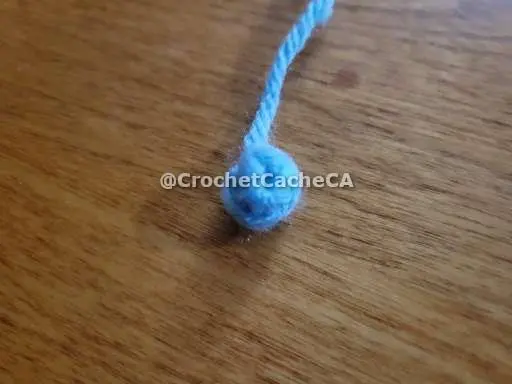
Tail
| Rnd 1 | Blue - 6sc in Magic Circle (6) - Leave a long starting string, feed it throug the magic cirlce. |
| Rnd 2 | 6inc (12) |
| Rnd 3 | (1sc, inc) x 6 (18) |
| Rnd 4 | (2sc, inc) x 6 (24) |
| Rnds 5-7 | 24sc (24) |
| Rnd 8 | 12sc, 6inv dec (18) |
| Rnds 9-33 | 18sc (18) - Start Stuffing |
| Rnd 34 | 9sc in back loops only, 9sc (18) |
| Rnd 35 | 9sc in front loops of the previous row, 9dc (18) |
| Rnd 36 | 18sc (18) |
| Rnd 37 | (sc, inv dec) x 6 (12) |
| Rnds 38-40 | 12sc (12) - sl st, leave long tail to attach to body. - If you have the long starting string use it to curl the tip of the tail into its self and using the starting string to secure the tip of the tail to the body of the tail. If you didn't have a long start tail, that is ok! Just attach a string to the magic circle. |

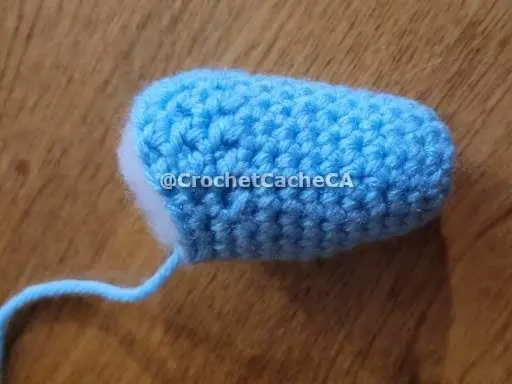
Arms
**Make Two**
| Rnd 1 | Blue - 6sc in Magic Circle (6) |
| Rnd 2 | 6inc (12) |
| Rnd 3 | (3sc, inc) x 3 (15) |
| Rnd 4 | 15sc (15) |
| Rnd 5 | (4sc, inc) x 3 (18) |
| Rnd 6 | 18sc (18) |
| Rnd 7 | (8sc, inc) x 2 (20) |
| Rnds 8-9 | 20sc (20) |
| Rnd 10 | 12dc, inv dec, 4sc, inv dec (18) |
| Rnd 11 | 12dc, 6sc (18) |
| Rnd 12 | 2dc, dc dec, 4dc, dc dec, 2dc, 2sc, inv dec, 2sc (15) - sl st, leave long tail to attach to body. |
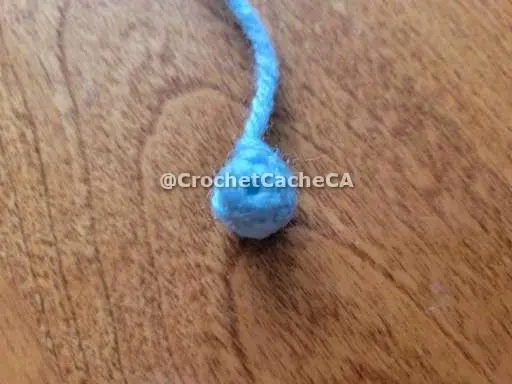
Fingers
**Make Six**
| Rnd 1 | Blue - 4sc in Magic Circle (4) - sl st, leave long tail to attach to arms. |
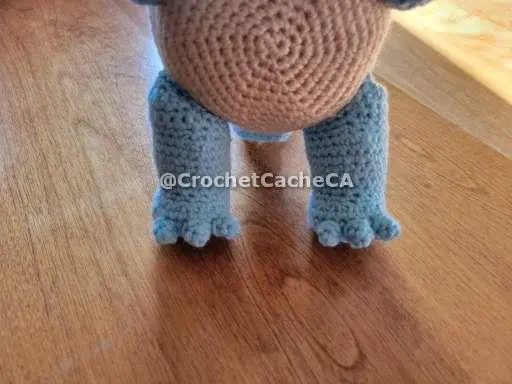
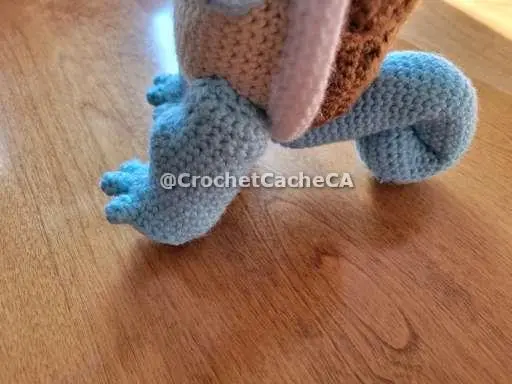
Legs
**Make Two**
| Rnd 1 | Blue - 6sc in Magic Circle (6) |
| Rnd 2 | 6inc (12) |
| Rnd 3 | (sc, inc) x 6 (18) |
| Rnd 4 | (2sc, inc) x 6 (24) |
| Rnd 5 | 24sc back loops only (24) |
| Rnd 6 | 24sc (24) |
| Rnd 7 | 6sc, 6inv dec, 6sc (18) |
| Rnd 8 | 18sc (18) |
| Rnd 9 | 8sc, 2inc, 8sc (20) |
| Rnd 10 | 20sc (20) |
| Rnd 11 | 9sc, 2inc, 9sc (22) |
| Rnd 12 | 22sc (22) |
| Rnd 13 | 10sc, 2inc, 10sc (24) |
| Rnd 14 | 24sc (24) |
| Rnd 15 | 10sc, 2inv dec, 10sc (22) |
| Rnd 16 | 9sc, 2inv dec, 9sc (20) |
| Rnd 17 |
***Left Leg*** 11sc, chain turn |
| Rnd 17 |
***Right Leg*** Chain turn, 11sc, chain turn |
| Rnd 18 | Skip stitch, chain turn, 10sc, chain turn |
| Rnd 19 | Skip stitch, chain turn, 9sc, chain turn |
| Rnd 20 | Skip stitch, chain turn, 4inv dec, sc - sc around the opening of the leg. - sl st, leave long tail to attach to body. |
Toes
**Make Six**
| Rnd 1 | Blue - 3sc in Magic Circle (3) |
| Rnd 2 | inc, 2sc (4) - sl st, leave long tail to attach to feet. |
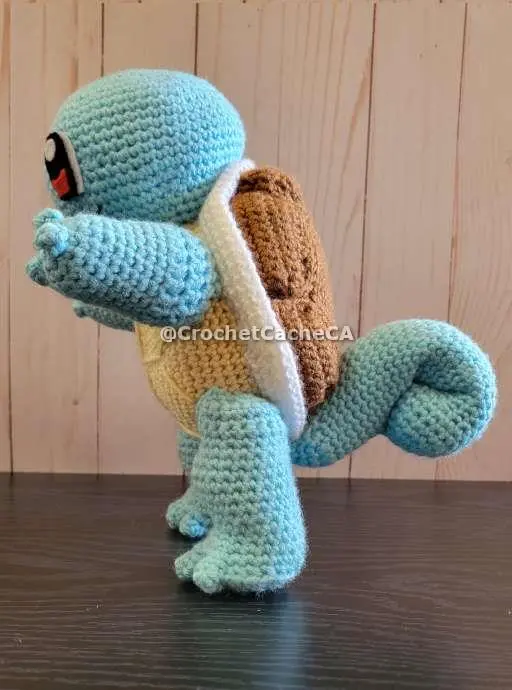
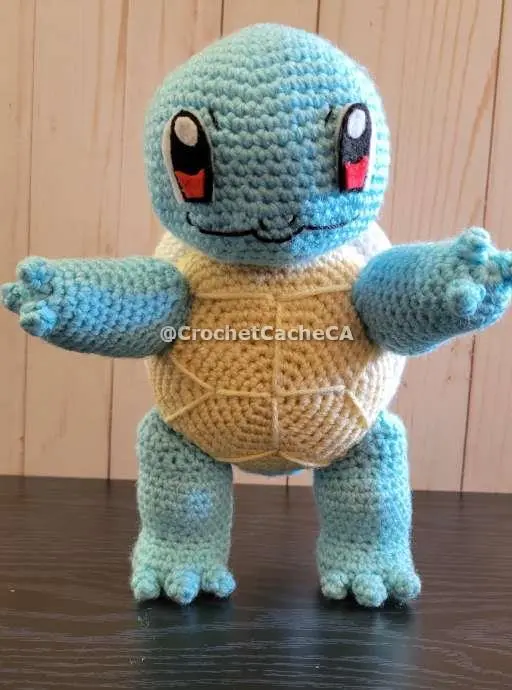
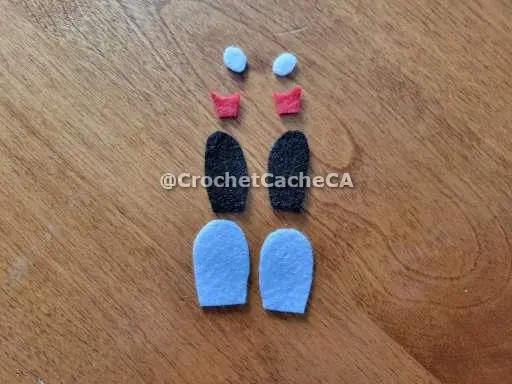
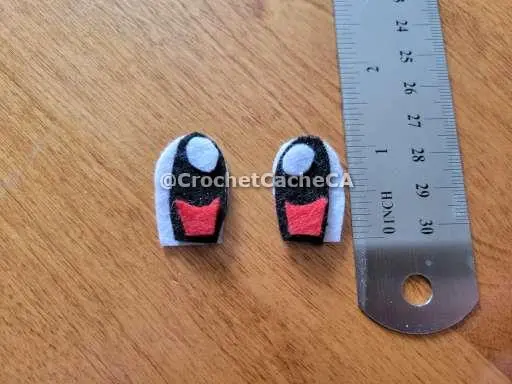
Eyes
| For the eyes you need: red, black and white felt. Cut the felt into the shapes below. You can sew them together if you would like. I hot glued mine as well as to the head. |
Assembly
- - Attach the head to the body with the remaining almond yarn from attaching the body to the shell.
- - Attach the tail at the bottom center of the shell, where the shell and body attach, feed some of the remaining yarn through the shell to attach the tail higher up to keep the tail raised.
- - Attach three fingers to each arm, in the shape of a triangle
- - Attach the arms on each side of the body, infron of the shell rim. About an inch lower then the head.
- - Attach three toes to each foot at the front of the foot.
- - Attach the right leg to squirtle's right side and the left leg to the left side. Again infront of the shell's rim
- - Hot glue the eyes to the head using the Tr as markers to position the eyes.
- - Stitch on a mouth, nostrils and eye brows using the black crochet thread.
- - Stitch the stomach lines using the almond yarn.
YOUR DONE!


Conclusion
And that’s it! Your very own Squirtle for your very own Squirtle Squad. Hope you had fun working on this project, and I cannot wait to see what you come up with on social media!
I hope you enjoyed this project; it was super fun to design! If you have any questions, do not hesitate to contact me.